-
Why We Almost Didn't Buy a Machine at All
-
How to Reset a Tajima Embroidery Machine (I Learned the Hard Way)
-
Stabilizer for Embroidery Machines: The $300 Lesson
-
Hat Patch Embroidery Machine Setup: The Details I Underestimated
-
Nine Months Later: The Actual ROI
-
What I'd Tell Another Procurement Manager
It started with a cardboard box of ruined patches.
In March 2023, our longtime embroidery vendor shipped 300 hat patches that were all misaligned—off-center by at least 3 millimeters, with thread colors that didn't match the Pantone references we'd sent them. My production manager spotted it immediately. I did the math after he called me. At $4.20 per patch plus the rush redo charge, that "reliable" outsourcing arrangement ended up costing us roughly $1,800 in a single week.
I'm the procurement manager at a 40-person apparel decoration company. For six years, I've tracked every dollar we spend on outside services in our cost system. When I audited our 2023 numbers in December, the embroidery line item came to $64,000. That was the trigger. I sat down with the owners and said we needed to look at owning our own machine.
Why We Almost Didn't Buy a Machine at All
For the first couple of weeks, the debate wasn't which machine—it was whether we should even go down this road. We already had a bright sewing machine on the floor for repairs and quick alterations, and a few people on the team thought we could "just make it work" for embroidery too. It took one test run—a stretched-out logo on a polo shirt that looked terrible—to kill that idea. A sewing machine moves fabric in one direction and sews a seam. An embroidery machine coordinates thread tension across multiple needles while moving the hoop on two axes at high speed. They're not interchangeable, and I'm glad we learned that for the price of one shirt instead of a full production run.
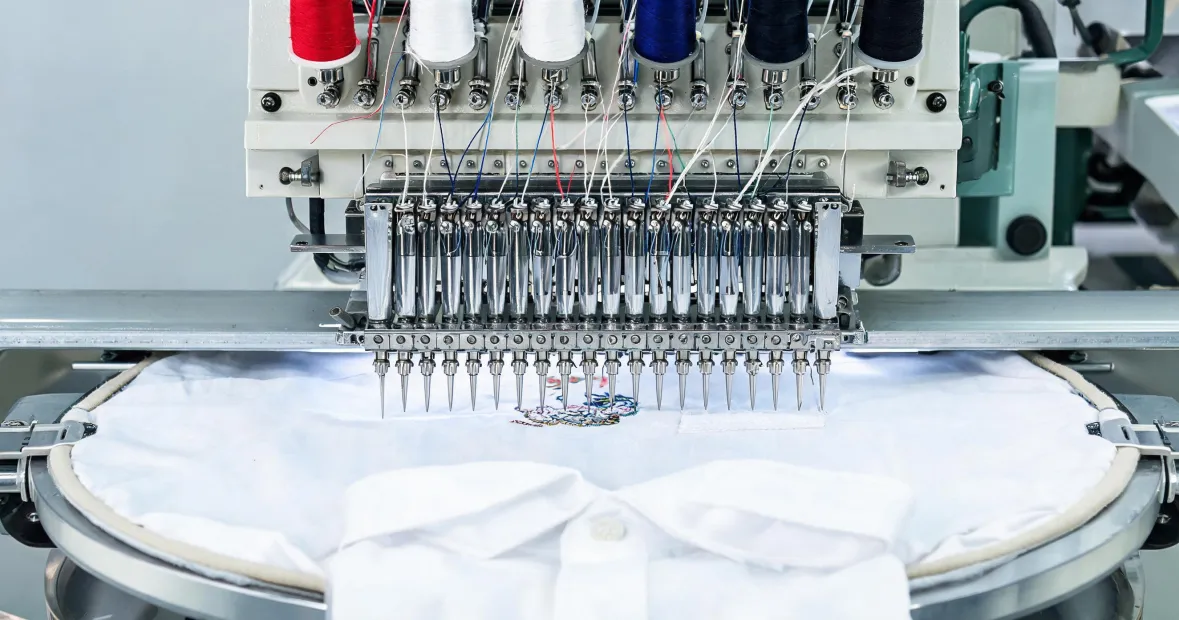
So I got serious about the total cost of ownership. I compared three options: a single-head machine, a used multi-head, and a new 4 head Tajima embroidery machine. I built a spreadsheet (I've been burned by hidden fees twice, so I don't compare prices without factoring every line item):
- Single-head: Lower upfront cost, around $15,000–$20,000, but capacity tops out at about a quarter of a 4-head's output. For our projected volume, the per-piece cost would've stayed too high.
- Used multi-head: A legitimate option—a few of our peers run used machines profitably. But most of what we found came without a factory-backed warranty or training, so I added a $3,000 risk buffer for potential repairs and downtime in the first year.
- New 4-head Tajima: Higher upfront, but the quote included installation, a full day of on-site training, and a real warranty. For our mix of hat patches, chest logos, and small-batch runs, it gave us the lowest total cost per unit.
The dealer didn't push us toward a 6-head model. He said something I didn't expect: "For your volume, 4 heads is the sweet spot. Six would be wasted capacity until you grow." That honesty built more trust than any discount could've. In my experience, a vendor who tells you what you don't need is a vendor you can rely on for what you do.
We signed in January, paid $38,500 for the machine, and by the time I added cap frames, training, an initial stabilizer order, and shipping, the real total was around $43,000. That gap between quoted price and the cost to become productive is where budget surprises hide, so I plan for it now.
How to Reset a Tajima Embroidery Machine (I Learned the Hard Way)
The machine ran beautifully for the first two days. The technician stayed with us for half a day, ran a sample job, and left us with a stack of manuals we all promised to read. The team was feeling confident—maybe too confident.
Then, on day three, it stopped. Mid-stitch on a dense hat patch design, the control panel flashed an error, the needles were down in the fabric, and the touchscreen wouldn't respond. My first instinct was to hit the power button and restart it like a frozen computer. My production manager grabbed my arm before I could.
"Don't. You'll lose the home position."
That was my introduction to the reset procedure for a Tajima embroidery machine. It's not a reboot. The exact sequence depends on your model and controller generation, but for ours it went like this:
- Press the emergency stop or pause to confirm the machine is fully halted.
- Release any head locks and manually turn the handwheel to bring the needles to the home position.
- Power on the control panel with the reset key held, and let the carriage re-sync its X-Y origin.
- Wait for the machine to complete its homing cycle before loading any new design.
Skipping that and just flipping the power off and on can send the carriage slamming into the side frame. We found out the hard way—my production manager powered it down before I could stop him, and the bang was loud enough that the whole shop turned to look. It didn't damage the machine, but it was scary, and I don't recommend learning that way.
The underlying cause was our mistake, not the machine's. The pattern relied on a high-density design with a thick foam backing inside a heavyweight cap. The needle deflected, and the safety sensor did exactly its job. When I called Tajima's support line, the technician walked me through the reset on the phone and told me what the error code meant. That call lasted about ten minutes, and I've since made a point of asking every machine vendor to walk through their reset procedure before delivery, not after.
Stabilizer for Embroidery Machines: The $300 Lesson
If I could go back and give myself one piece of advice on day one, it would be this: the stabilizer is half the battle.
I only believed that after ignoring it. Our first sample patch looked perfect on the top side. When we flipped it over, the back was covered in loose thread buildup, and the fabric had puckered around the edges. I assumed the machine tension was off, so I fiddled with the tension dials for two hours. Guess what? It got worse.
Finally, I called our thread supplier, who asked one question: "What stabilizer are you running?"
I didn't know. When I'd placed the initial supply order, I bought a single roll of light tearaway without a second thought. For hats and patches, you need something sturdier—typically a cutaway in a mid-to-heavy weight, and often a water-soluble topper for textured fabrics. The wrong stabilizer shifts during stitching, which causes puckering and, in worst cases, needle deflection. It wasn't the machine's fault. It was mine.
We switched to a mid-weight cutaway for hat patches and added a topper for the textured caps. The next sample was clean on both sides. All told, that lesson cost us about $300 in wasted cap stock and thread, plus a couple of hours of tension dialing that aged me. But it taught me something valuable: when an embroidery machine acts up, check the consumables before you blame the hardware.
Hat Patch Embroidery Machine Setup: The Details I Underestimated
When our sales team landed a contract for 500 embroidered hat patches in March, I was excited. That was exactly the high-margin, repeatable work we'd bought the machine for. But the details turned out to be more involved than I'd imagined.
A hat patch isn't just a logo sewn onto a cap. You embroider the design onto twill or felt, cut it into shape, and then attach it to the hat—either by sewing the patch on or using a heat-seal adhesive. That means the backing has to be dense enough to hold the patch's shape after cutting, but not so dense that it feels stiff and uncomfortable on a cap.
The machine handled the cap frame and hoop beautifully. But we had to adjust our digitizing: a tighter underlay stitch to stabilize the design and a 75/11 needle for the finer details in the logo. Once those parameters were dialed in, the 4-head ran for hours without a single dropped stitch. The lesson for me was that this kind of work is a system—design, backing, needles, and frame—not just the hardware.
Nine Months Later: The Actual ROI
By the end of October 2024, we'd tracked 212 jobs through that machine. Our production team logged about 1,400 machine hours. The total cost—machine, accessories, stabilizers, threads, maintenance, and one service visit—came to roughly $52,000.
The same 212 jobs would've cost about $84,000 at the rates we were paying our outsourcer in 2023. That difference of about $32,000 over roughly nine months puts our payback period around 14 months, assuming our production volume holds. That's a solid result for a $43,000 investment.
But I'll be honest about the caveats. That payback math falls apart if volume drops by half—the payback would probably stretch past two years. It also assumes we don't hit a major repair. And there are still jobs we outsource. We don't run chenille, we don't do sequin work, and we refer orders above 2,000 units to a bigger shop that runs 12-head machines. That's not a failure; it's basic economics. A specialist who runs chenille all day is going to do it better and cheaper than we can. When a customer asks, I tell them honestly, "Here's who does this better," and that honesty has kept us out of trouble more than once.
What I'd Tell Another Procurement Manager
If you're where I was in early 2024—staring at outsourced embroidery costs and wondering whether bringing it in-house makes sense—here's my advice. One caveat: my experience is based on one machine at one 40-person shop. If you're running a larger factory or a different product mix, your numbers will probably be different.
- Compare total costs, not quoted prices. Training, frames, stabilizers, maintenance, and your team's learning curve are all part of the investment.
- Set aside a small "mistakes budget" for the first month. We spent $300 on stabilizer waste alone.
- Learn the reset procedure and the common consumables issues before you need them. A ten-minute call to tech support is easier than a three-hour panic.
- Ask your prospective vendor what they recommend you not buy. If they can't answer that, be cautious.
Bringing embroidery in-house was the right call for our numbers. We control the quality now, we produce the majority of our patches and logos in-house, and the unit cost keeps coming down as the team gets faster. If your own spreadsheets are telling you the same story, it might be time to take the plunge.

Leave a reply