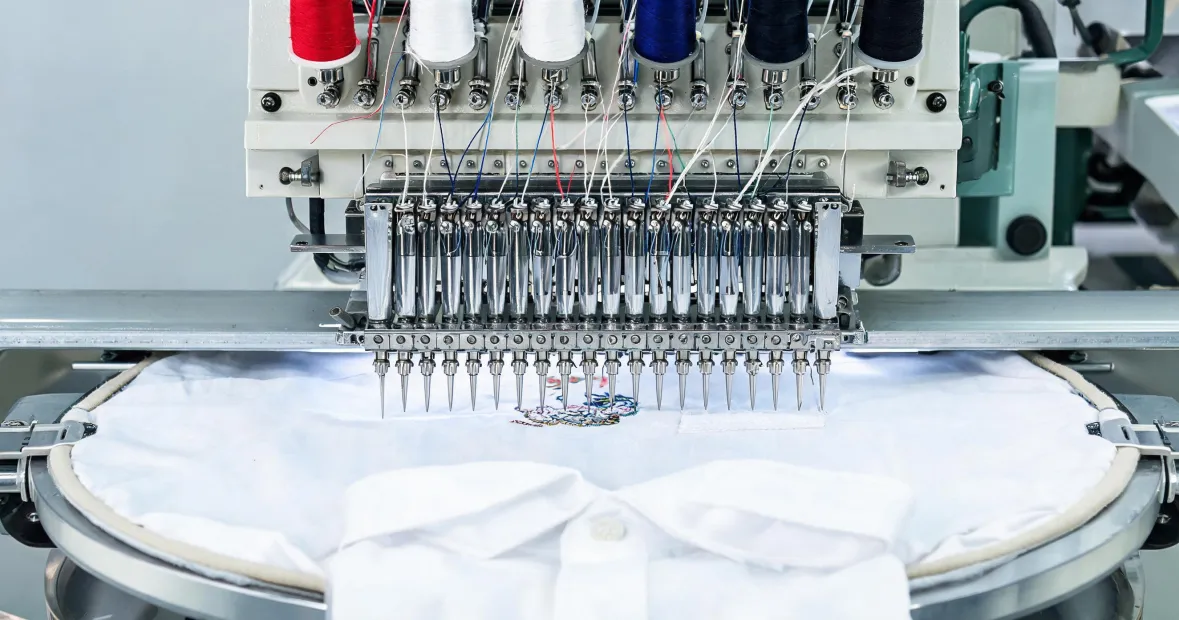
- Start with the Tajima Embroidery Machine Manual, Not the Price List
- Tajima 4 Head Embroidery Machine Price: The Real Cost Breakdown
- B500 Embroidery Machine: The “Smaller” Machine That Acts Big
- Modern Embroidery Machine: What Changed and What Didn’t
- Best Fabric for Embroidery Machine: It Depends on Your Machine Setup — Here’s How to Decide
-
How to Know Which Tajima Setup Fits Your Shop
Ask ten embroidery shops which Tajima model is “best” and you’ll get ten different answers. Not because they’re wrong—but because the right machine depends on your order mix, your staff, and the fabrics you actually run. I learned this the expensive way.
In my first year (2017), I pushed hard for a specific multi-head model. Good machine—but the wrong fit for the volume of caps and structured garments we were taking in. That mistake cost us roughly $1,600 in attachments and add-ons we didn’t need on day one, plus a steep learning curve. So let’s walk through what I’d check first this time, starting with the manual everyone skips.
Start with the Tajima Embroidery Machine Manual, Not the Price List
The manual is dry. I get it. But the manual tells you things that sales pages don’t. The manual lays out the machine’s service intervals, thread path tolerances, hooping system limits, and the exact needle sizes recommended for your machine. That last part is where I first messed up.
We once used a needle spec that was technically compatible but not recommended. It sewed okay on flat polyester but behaved badly on twill caps. We blamed the cap driver, the thread, even the digitizer. It was the needle system. The manual had it in a chart on page 38. (Took me a while to admit that one.)
What most people don’t realize is that the machine manual is not a troubleshooting document. It’s a baseline document. It defines standard operation, intended environments, and maintenance windows. If you buy a used Tajima and the seller cannot provide the manual, do not buy it. I know that sounds dramatic, but here’s the reasoning: without the manual, you don’t know which maintenance kit fits, which oil type goes into which port, or how to read the error codes on older models.
Manual Sections Worth Copying Into Your Shop’s Checklist
- Thread path diagram: Even experienced operators miss a guide when they’re rushing. Tape a laminated copy next to the machine.
- Recommended needle sizes per fabric type: This will save you from the “weird tension” rabbit hole.
- Lubrication schedule: Tajima machines are durable, but only if they’re maintained. A skipped oiling routine is a common cause of premature wear.
- Hoop compatibility chart: Not all hoops are compatible with all models. The B500 has some interesting options here that differ from older SA series machines.
Tajima 4 Head Embroidery Machine Price: The Real Cost Breakdown
“Tajima 4 head embroidery machine price” doesn’t have a quick answer. A new 4-head machine can range from roughly $45,000 to $70,000 depending on configuration, cap capability, and whether it’s a model with a large color change system. (Based on typical U.S. market quotes I’ve seen and verified with dealers in early 2024; verify current pricing with your local Tajima distributor.)
But here’s the thing that new buyers miss. The machine price is maybe 60% of your real investment. Let me break down the rest:
- Installation and training — not always included at the depth you need
- Hoop and backing — more expensive than you expect
- Cap drivers and frames — you may only need these later, but you’ll eventually buy them
- Pulse software or equivalent digitizing tools
- Voltage conditioning — Tajima manuals usually specify clean power requirements. An unstable power supply causes needle breaks and electronic glitches. We lost a weekend to this once.
New vs. Used vs. Refurbished 4-Head Machines
This is where I divide my answer into two scenarios, because I’ve now been on both sides.
Scenario A: You are a new shop without an experienced in-house technician.
Listen: buy new or buy from a certified refurbisher. Used machines can be great value in the hands of someone who can inspect the presser feet, timing, and main shaft. But if you cannot check those things, the risk is on you. What most people don’t realize is that used multi-head machines often need timing adjustments and tension system calibration shortly after installation. The labor alone can eat up your savings.
Scenario B: You are an established shop with a dedicated technician.
You can absolutely consider a used machine, but read the manual first. Look at the machine’s stitch count. Find out if it was run in a high-volume production environment or a smaller custom shop. Get the Tajima service records if available. If the seller cannot produce a manual or any service history, walk away.
In other words: the price anchor matters, but it’s less important than the availability of the manual and the service chain.
B500 Embroidery Machine: The “Smaller” Machine That Acts Big
I’ve seen the B500 described simply as “a single-head Tajima.” That’s true, but it undersells it. The B500 is a modern, cap-capable single-needle machine that sits in a different category than the old single-head workhorses. It is not the right machine for every job—but it is the right machine for many shops that don’t want to admit they’re doing sample work, small runs, and prototype development alongside bulk production.
If a customer wants 48 identical hats, a 4-head machine is probably a better fit. If they want two samples for approval, or six pieces for an event order, the B500 can be more practical. There’s a common misconception that bigger production always equals faster profit. In my experience, small orders waste the biggest machine if you have to stop a full multi-head line to run a sample. Let the B500 take that hit.
Where the B500 Fits in a Workflow
- Prototype and sample stitching, using the same stitches and thread paths that will be scaled to production
- Hat and cap runs in small to medium batches
- New operator training. It’s a far more forgiving space to make first mistakes than a 4-head frame where tension inconsistencies are harder to isolate.
Modern Embroidery Machine: What Changed and What Didn’t
Modern embroidery machines—Tajima included—have evolved in software and motor control. I can say without marketing hype: the Pulse software integration and color-change logic on newer models save real time. We cut our run setup from about 25 minutes to 12 minutes per design on the newer machine. With 20 design changes a week, that adds up fast. This is exactly why I keep my “digital efficiency” stance: fewer manual steps reduce human error. That’s not romantic, but it’s true.
Not everything old is bad. There’s a reason vintage Tajima SA models still run in some shops. They’re mechanically solid. But the thread tension control, cap options, and error reporting on modern models are significantly sharper. When your dealer asks if you need a cooling system add-on, listen carefully. It’s not just about preventing overheating. It affects thread behavior at high speed.
One Insider Note No One Told Me Early On
Here’s something vendors won’t tell you: machine software updates often change the way you import files from your digitizer. The machine manual might reference an older format that your software no longer exports. Always test with a two-inch sample before running a full batch. (Worse than expected? A small sample is worthless if it makes you ignore the fact that the final design is 0.8 in too large.)
Best Fabric for Embroidery Machine: It Depends on Your Machine Setup — Here’s How to Decide
If you search “best fabric for embroidery machine,” you’ll get the expected list: twill, denim, fleece, terry cloth, sometimes leather with a leather needle. That list isn’t wrong, but it’s irrelevant without context. The best fabric depends on what your machine can handle, and more importantly, what your needle, thread, and backing can handle.
So here’s a better way to think about it.
Structured fabrics (caps, twill, tight weaves): Tatami and satin stitches hold shape well. Use a sharp needle and a cut-away backing for stability. This is also where you want the cap driver to hold the surface flat. Loose hooping shows up immediately as push-pull distortion.
Stretch fabric (jersey, performance wear): This is where the embroidery machine’s feeding system matters. As long as you use a ballpoint needle and a float mesh backing, you’ll get acceptable results. The fun part: modern machines with adjustable presser foot pressure handle stretch better than old machines. On a B500, adjust the pressure setting and test before you trust it.
Terry cloth / towels: Yes, it’s a popular choice, but it’s actually one of the trickiest for new operators. The pile shifts during stitching. You can reduce the problem with a water-soluble topping and a sharp needle. But if the manual says your machine’s default presser foot pressure is too high for terry fabric—believe it. Here’s another lesson I learned the hard way.
My Two Most Expensive Fabric Mistakes
In September 2022, we accepted a rush order with custom-printed jackets for a corporate event. The print itself was fine. The embroidery on the left chest was not. We didn’t use a backing, because the client needed the jackets to feel soft from the inside. The result: puckering on every piece. Thirty-six jackets, $1,600 replacement cost, and a very awkward phone call.
The second mistake was quieter: we recommended the wrong backing for a fleece order because I confused “soft hand feel” with “no backing.” I’ve made that mistake before, but that time it affected a 250-piece run. We didn’t have a formal backing approval process for that order. The third time this kind of problem happened, I finally created a fabric-and-backing verification checklist. Should have done it after the first time. We’ve caught fourteen potential errors with that checklist in the past year.
How to Know Which Tajima Setup Fits Your Shop
If you’re still reading because you’re trying to decide between a single-head and a 4-head Tajima, this is the part where I help you figure it out.
Answer these honestly:
- What’s your average order size per SKU? (If it’s under 20 pieces, a 4-head machine may be idle too often.)
- What’s your fabric mix? (If caps and structured garments are the majority, config matters more than head count.)
- Do you have a technician on staff or on retainer? (No? Buy with the strongest dealer support and warranty you can afford. Yes? Leased or well-inspected used machines become realistic options.)
- Does your client base value fast sampling? (Then allocating one B500 to sample work protects your multi-head production time.)
Exactly what we needed: a small test run. That’s often the best answer. Test your specific fabric, design, and machine combination on a one-piece sample before scaling. If that sample fails, the file or the fabric setup is wrong—the machine rarely is.
I’m not saying there is no universal answer. If your budget only allows one machine and your work is primarily caps and samples, the B500 is the most flexible option. If your revenue is built on bulk production of structured and flat goods, a 4-head is the logical workhorse.
Neither choice is wrong. But choosing before reading the manual, verifying dealer support, and testing with your actual fabric—that’s the wrong part. Avoid that and you’ll do fine.

Leave a reply