-
This checklist is for emergency machine buys
-
1. Do the production math before you search listings
-
2. Verify the machine is physically there
-
3. Stitch your worst job, not their best demo
-
4. Buy on total installed cost, not sticker price
-
5. Match the machine platform to your product mix
-
6. Check parts and service lead times
-
7. Put the delivery date in writing, with a buffer
-
Common mistakes I see in rush purchases
This checklist is for emergency machine buys
In March 2024, a shop owner called me on a Monday morning. He had just signed a contract for 12,000 embroidered hats, with the first 3,000 pieces due in 19 days. His four-head machine couldn't possibly hit that rate, and he was ready to wire a deposit to whichever dealer showed inventory first. I stopped him partly because I have seen that impulse end badly, and partly because rushing a commercial equipment purchase is exactly when the expensive mistakes happen.
I coordinate embroidery machine purchases for a living. Over the last decade I've helped shops buy everything from their first Tajima single head machine to multi-head production lines, often under deadlines that made no sense. The steps below are what I take emergency buyers through. If you're in this spot, work them in order. It will take about a day, and it will keep that tight deadline from turning into a five-year regret.
If you are a hobbyist sewing on weekends, most of this checklist is overkill. This advice is written for shops running commercial production five days a week, where downtime has a dollar amount attached to it.
1. Do the production math before you search listings
It's tempting to search for “tajima sai for sale” and start comparing photos. Don't. You're not buying a machine; you're buying pieces per hour. Work the math first.
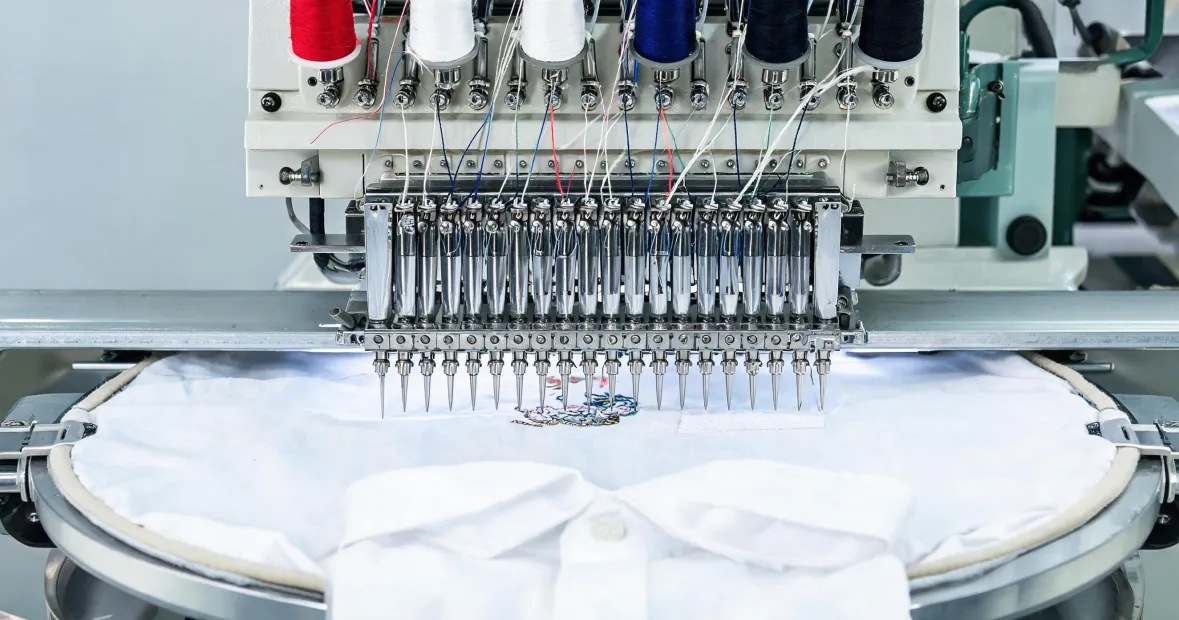
Example: 3,000 pieces in 19 days at one 9-hour shift means about 17 pieces per hour need to leave the floor. A 12,000-stitch design on a commercial machine runs around 17 minutes at typical efficient speeds (think 700–750 stitches per minute) before hooping and handling. A four-head machine produces four pieces per cycle, so it will do roughly 12–14 pieces per hour in real-world conditions. That's not enough. Now you know you need at least a six-head, or two smaller machines, before you ever look at a brochure.
Write down: pieces needed per day, average stitch count, largest hoop or frame size, and whether you need caps, flats, chenille or tubular work. This one page of notes is the filter that stops a salesperson from selling you a beautiful machine that can't do your actual job.
2. Verify the machine is physically there
The first surprise I had in this industry: a lot of “for sale” listings are not backed by an actual machine. Some online sellers post stock photos, take your deposit, and then try to source the unit from another listing after you've paid. When your back is against a deadline, that is catastrophic.
Every machine on your shortlist needs three things: a serial number, a photo of the serial plate with today's date on a sticky note next to it, and a live video call where the machine powers on, moves axes, and changes color positions. If the seller won't do a video call, ask yourself why. On a normal purchase you might have time to untangle that later. On an emergency purchase, you don't.
The FTC requires advertising claims to be substantiated (see FTC business guidance at ftc.gov). “Machine runs great” is a claim. Video is proof.
3. Stitch your worst job, not their best demo
A demo file is chosen for a reason: because it's easy. Your real work is not. Bring the file that always gives you trouble: dense satin lettering, tiny 6 mm text, thick twill, appliqué that has to line up. Ask to run that exact file on the exact machine you're considering.
If the machine is too far to visit, send your file and watch it run on a video call. Then ask the seller to mail you the physical sample. A fabric swatch that fits in a standard envelope can go First-Class Mail for the current USPS rate ($0.73 as of January 2025, per usps.com). That small piece of cloth tells you more about tension, registration and trimmer reliability than any spec sheet.
Color matters here too. If your client's logo is a Pantone spot color, do not trust a monitor. Thread manufacturers publish conversion cards based on the Pantone Color Bridge, and that gets you close, but embroidery thread is dyed differently and stitches at an angle. Compare the actual stitched color to the client's swatch under the light they will use. For brand-critical logos, ask for a Delta E under 2.
4. Buy on total installed cost, not sticker price
Look, I'm not going to tell you price doesn't matter. It does. But the machine with the lowest price tag is rarely the cheapest machine once it's installed and running.
I once watched a shop save $1,700 on a machine from an online reseller, then pay $1,100 in freight, $600 for an electrician to add a 220V line, and $400 for missing clamps and bobbins. The machine cost more than the dealer's price before it ever sewed a stitch, and it had no warranty or training included.
When you compare quotes, include: freight and rigging, electrical and air hookup, hoops and cap drivers, software, training, and a spare parts kit. A $2,000 higher quote that includes setup, training and a first-year parts stock is often the cheaper option. Get everything itemized so you're comparing total cost, not just the number in big type at the top.
5. Match the machine platform to your product mix
The question isn't “which Tajima is the most impressive?” It's “which Tajima produces this exact order before the deadline?” A Tajima SAI series machine is a proven workhorse, but SAI covers several configurations. Know what you'll feed it.
If you need serious volume, the number of heads matters more than any badge. A Tajima single head machine is a sensible choice for sampling, patches and test runs; it earns its keep without tying up a multi-head. If you need 17 pieces per hour, the six-head is your machine, and a single head is a nice addition later.
This is also the moment to be honest about size. Needing an embroidery machine big enough for a new order is not the same as needing the biggest machine you can fit through the door. Bigger frames and more heads cost more, take more maintenance, and can actually run slower while keeping quality high. Buy the smallest platform that meets your production number with a buffer. That buffer is the entire game.
One more option to understand before you search: an Aveneer embroidery machine may show up in your results. Aveneer is part of the Tajima Group but built to a simpler, lower-cost formula. It is not a Tajima and should not be compared as if it were. For a shop that needs basic, reliable multi-color production without the full option list, it can be a legitimate choice. Just know which tier you're actually buying.
6. Check parts and service lead times
Machines break. When yours breaks on a deadline, your only question is: how fast can the part reach me? That's why I always check the parts ecosystem before paying.
Searching for “embroidery machine parts manufacturers” returns a mix of OEM and aftermarket suppliers. My bias, after years of watching repairs: use genuine parts for electronics, trimmer assemblies and motors. Aftermarket consumables like needles and bobbins are fine; a cheap circuit board is not.
Ask the seller or manufacturer before purchase: is this model still current? Are electronic boards still available? Can you order genuine spare parts using the serial number? Will a local technician work on it? If the answer is “we can get it in 3–5 weeks,” and you can't afford 3–5 weeks of downtime, that machine does not meet your needs no matter how good the price is.
7. Put the delivery date in writing, with a buffer
The step that saves the most emergencies is also the one everyone skips. Not “four to six weeks.” A specific calendar date.
I learned this after trusting a verbal two-week promise. The machine arrived on day 38, after the deadline and after the work had been split among three subcontractors. There was no penalty on paper, so there was no recourse. That mistake is why every sales order I write now includes the date the machine must be on the floor, the date installation will be finished, and a buffer of at least 48 business hours before the first production shift depends on it.
Why does this matter? Because freight delays happen every week, and a week's delay can erase the entire reason you bought the machine. If a seller can't commit to a date, keep calling other sellers.
Common mistakes I see in rush purchases
A few last things to watch for:
- Skipping infrastructure. Check voltage, phase, air supply and floor space before signing. A machine that needs a $2,000 electrical upgrade after arrival is a nasty surprise.
- Buying a warehouse of accessories instead of the right tools. You need the correct hoops and cap drivers for the jobs you have, not a catalog of every frame ever made.
- Forgetting training. If your team doesn't know the machine or the software, a fast machine will not save you. Tajima's Pulse software is powerful, but only when someone actually knows how to use it under pressure.
In a rush, it feels wrong to slow down. It isn't. Checking availability, stitching the actual work, adding up real costs, and confirming parts and delivery dates take about a day. The wrong machine, bought in a panic, takes years to pay off.

Leave a reply